|
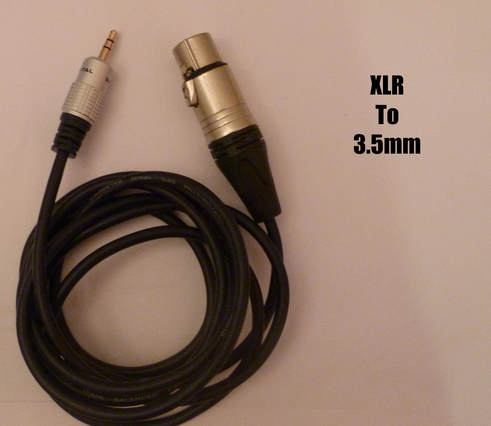
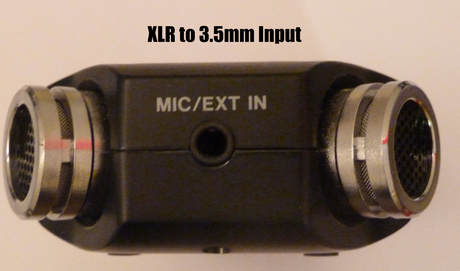
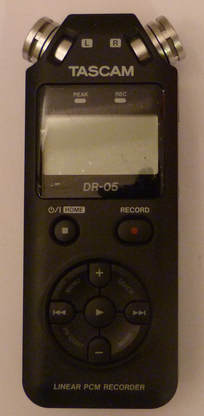
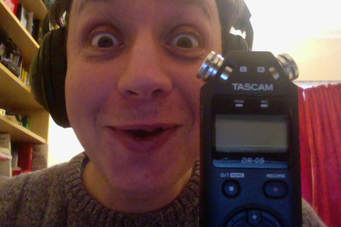
Why Podcasters and Presenters Should Make Radio Packages In this blog, we'll look at: 1. What's a radio / audio package? 2. Why radio presenters & podcasters should make audio packages. 3. Beginner mistakes. 4. Listening to the professionals. 5. Where to find examples of radio packages. 6. Microphone and audio recorder or just an audio recorder? 7. Radio reporter microphones. 8. Which audio recording unit should I buy? 9. Budget audio recorders. 10. How to record quality audio on location. 11. Bad places to record audio. 12. Good places to record audio. 13. Safety tips. 14. Making a radio package. 15. File formats. 16. Recording in mono. 17. Learn the mechanics first then transfer up. 1. What's a Radio Package? Let's break it down into small segments. A radio package (or audio package) must entertain. It must provide information to your listener. In other words, it must leave the listener knowing more about a subject. A Radio Package Can Contain: An interview with one or more people. This can be in someone's home, at their business or out on location such as a park etc. A vox pop. This is a collection of people answering the same one or two questions, which is then edited down to fifteen/twenty seconds. Live location atmosphere. For example, you're making a package about a band, and you want to showcase the live gig etc. Or, you're at a business seminar, and you want to get some atmosphere for your podcast. Background and current information on the story. You can easily do this by voice over. Sound effects. Using audio to help tell a story. Example of Sound Effects Audio of a phone ringing. Recording of someone picking up the phone. Live audio of someone saying "Welcome to The Squirrel Rescue Shelter." These sound effects can help tell the listener where we are. 2. Why Presenters Should Make Audio Packages for Their Shows. Being able to create a high-quality 'radio package' (and that means one with good audio quality) can enhance your show or podcast. A radio or audio package allows you to get out of the studio, and to gain access to stories, interviews and events that normally you could only cover by reading from text. Once you have a portable recording unit (more on this later), you can make packages wherever you go. If for example, you host a soul show on community radio, you can then go to a gig, interview the band, and interview the audience. You can also do a before and after version. In other words, how do you feel before the gig? How are you enjoying the gig now? How did you enjoy the gig? This can give your listeners an atmosphere of what it was like to attend. If you're hosting a business podcast etc., you can do exactly the same about the event you attended. There are many other angles you can take. You could look at the venue itself, its history, the gig from a sound engineers point of view and so on. It's the same with your business podcast. Why are you going to this seminar? Why does this person influence you? What do you hope to get from this workshop? What have you learned from this event? Why would you recommend this event etc.? Radio Packages Can Lead to Radio Reporting Once you understand how to make a radio package, you could then progress onto becoming a radio reporter. To be a professional radio reporter, you'll need journalism and interviewing skills. However, creating packages for your radio shows or podcasts, will give you great experience and improve your shows. It will also make your shows/podcasts more interesting than the other presenters. These community reporting skills can help you go on to become a freelance reporter. I truly believe these are skills worth learning. Just to Note I'll only be looking at pro positive packages in this blog. Most of you will be hosting a music show or a business podcast. You won't need to create a hardcore journalism package. I also won't be focusing on story. 3. Radio Reporting: Beginner Mistakes A common mistake that beginners make is when they try to emulate professional broadcasters. That is, they want to make all their packages on hard-hitting, dark, and serious subjects like whale molesting and squirrels on crack cocaine. In your beginner days, don’t make it hard for yourself. Just keep it simple. Light topics can make great radio too. Everything doesn’t have to be doom and gloom and serious. For those of you that want to make community journalism packages, this blog will teach you the mechanics. You'll just need to find your journalism angle. Feel free to check out my media interviewing course if you'd like to learn how to conduct media interviews. 4. Listen to the Professionals With any skill, it's always best to learn from the professionals. Go and listen to a few packages. See how the reporters have crafted their stories. Listen to how their voice-overs push the story forward, listen to the sound effects they use, listen to the location audio they've recorded. You can learn a lot by simply listening to the professionals. 5. Where to Find Examples of Radio Packages Radio 4 has numerous packages. Here's a good example of a typical radio package. It has a studio voice over, location audio, an external interview and music. American Examples of Radio Packages NPR.org has many accessible packages. StoryCorps I cheated! This isn't an example of a site with radio packages; however, I do like their site. They offer short 3-5 minute interviews. Check them out sometime. Radio Documentaries (Long form audio packages) The BBC World Service. If you can’t access these documentaries from outside of the UK, then consider using the free VPN TunnelBear. They give you 500MB of free streaming each month. If you send out one promotional tweet, then they'll give you an added 1GB. RTE Documentaries Radiolab approach storytelling differently. I like them a lot. Here's a great example. This American Life has a large back catalogue of stories. Which Audio Recording Device Should I Use? The answer to this question has many layers. It depends on your budget, it depends on your show, and it depends on your career ambitions. Let's look at this now. 6. Microphone and Audio Recorder or Just an Audio Recorder? If you want to be a professional radio reporter or a professional documentary maker, then a handheld reporter microphone and a recording unit is probably the way to go. You'll pay more now, but you'll have the equipment for life. You can consider these two devices as an investment in your future. This setup is more expensive because you're also paying for a quality handheld reporter microphone. Let's Talk Reporter Microphones First I can't give you a definite answer because everyone's situation is different. How much money do you have to spend? Will you be recording mostly vox pops outside in the wind or will you be inside recording press conferences? Will you be a presenter that walks and talks etc.? I'm only going to touch on this subject now. I plan to write another blog specialising in microphones. Here are two great pages from Transom.org. They tested eight handheld reporter microphones. (Finish reading this blog first though!) Page 1 shows you the microphones. Page 2 gives you an example of their audio quality. For the record, I use a Beyerdynamic MCE58. It's a dynamic microphone that has an omnidirectional pickup pattern. (More on the different types of microphones in my next blog). I also use a Tascam DR-05 as my audio recording unit. I connect the microphone to the unit with an XLR to 3.5mm audio cable. A Word for the Audio Snobs There's a lot of snobbery in the audio world. (Strangely, it's not like that in the video world). My setup goes XLR out (from reporter microphone) to a 3.5mm jack into the recording unit. XLR to XLR is Better...However..... An XLR output to an XLR input does provide better audio quality. If you have the budget for a reporter mic and a portable recording unit with an XLR input then get one. However, something like the Tascam DR-05 with a minijack input works just as well. Ignore the audio snobs. To be honest, there's not that much difference in the audio quality at a community level. A decent microphone is the main thing. An XLR out to mini-jack in is okay. Unless you're recording movie soundtrack audio, your radio/audio packages will sound fine with the XLR to 3.5mm cable. XLR to 3.5mm (Shock horror from the audio snobs here) You've Got to Know How to Record Quality Audio First If you don't know how to record quality audio in the first place, it doesn't matter what cable you use. I'll show you how to do that later on. A Microphone & Audio Recorder or Just an Audio Recorder? In 2000, the standard BBC radio reporter kit was a handheld reporter microphone and a mini-disc recorder. 7. Radio Reporter Microphones The two radio reporter microphones that the BBC used back then were: Beyer M58 (£130 / $174) This needs to be powered so I wouldn't recommend this for a starter mic. Beyer MCE58 (£271 / $379) (This can be found for around £200 if you shop around) I have a MCE58. That was back in the days when I was rich (unlike now lol!) For years, I used the MCE58 with a mini-disc recorder (3.5mm jack in) and the audio quality was perfect. In 2014, I went to Tokyo for six months. Believe it or not, Tokyo is cheaper than London. I picked up a Tascam DR-05 for £45 / $60. In the UK, the same unit costs £75. My Beyer mic works perfectly well with the Tascam. More Reporter Microphones: Erm...prices will always change since this blog. Use these as a rough guideline :) Ta! Rode Reporter Microphone Nowadays, you can get a Rode Reporter Mic for £118 / $158 You can also check out its audio quality here. Electro-Voice RE50N/D-B High Output Dynamic Interview Microphone I've never used this microphone, but it comes highly recommended. Here's a good youtube video on it. He used it with an XLR to 3.5mm cable. Watch it after reading this blog. It's down to You to Do Your Research Every case is different, research microphones and watch YouTube videos. Start with Transom's reporter microphone page. 8. Which Audio Recording Unit Should I Buy? Next, you need to buy an audio recording unit. My advice is, only spend good money if this is going to be a career option for you. Remember, most employers will provide you with the equipment. Here's an interesting page on the different audio recorders you could buy. It's a bit dated mind you. Check it out AFTER you've read this massive blog of doom! Microphone and Audio Recorder Setup Is Pricey for Newbies For you newbies, this setup is expensive. You need to buy an audio recording unit, and you need to buy an expensive handheld reporter microphone. You're probably looking at paying £200 - £250 ($267 - $334) for a semi-decent setup. 9. Budget Audio Recorders Zoom H2: £138 / $193 I'm going to assume your budget is limited. I'm also going to presume you're presenting on a local internet/community radio station or making a semi-pro podcast from home. There's no point spending £500 / $670 on expensive equipment if you're only presenting to five people on a tiny radio station. One of my ex BBC World Service, Radio trainers, now tutors at Goldsmiths, University of London. I asked him what do they recommend for their MA students. He said they recommend the Zoom H2. I've personally used a Zoom H2. It has great audio quality but (as well as the Zoom H1) it has some handling noise issues. They advise their students, just hold it carefully! This unit costs £138 and can easily make the packages you need. (By the way, I have no connection or affiliate with Zoom.) If it's good enough for students studying a masters degree in radio, then it's good enough for you. Here Is an Example of the Zoom H2 Outside Outside wind issue is always a concern. Here's a video with the Zoom H2 and wind cover. By the way, you can always make your own. Someone suggested using a car sponge. I might try that with my Tascam DR05. The Zoom H1: £74/ $99 You have to be a bit careful of wind and handling noise with this unit, but it will certainly do the job. Forgetting this guy's wig for a second, here's a good video on it. Zoom H1 Wind Test Always Monitor Your Audio None of these YouTube reviewers used headphones. Always use headphones. Why? Because then you can hear if you're popping or if the wind is affecting your recording. Oi Oi Pop Pickers! 10. How to Record Quality Audio on Location Why do we record audio on location? To get out of the studio environment. To go where the stories are. To get a sense of the “actuality” (the sense of being at an event). To record an interviewee in their home thus making them feel more relaxed. Recording overseas/in the field. Always Be Prepared If it can go wrong, it will. ALWAYS check EVERYTHING before you leave home. Do you have a memory card etc.? Does your microphone work? Have you tested your microphone to see if it’s recording? Is your microphone lead faulty? Do you have enough battery power in the recording device and microphone? Do you have spare batteries? Do you have a backup memory card etc.? Do you have headphones? Do your headphones work? Have you tested the device before you’ve gone out? Check ALL equipment BEFORE you leave. A faulty piece of equipment can often cause a complete failure of the recording. When You Arrive on Site The first thing to do when you arrive on site is to set up your equipment and then just listen. REALLY listen. Listen to where ALL the noises are coming from? Are you standing under a fan or a buzzing light? Are you close to a noisy road? Is there a background noise that will bleed all over your recording etc.? ALWAYS LISTEN FIRST Always resist the temptation to rush into the interview. Once you’ve listened, then the next thing to do is to record 2-3 minutes of “wildtrack” onto your recording device. (Wildtrack is the background atmos of the event/interview that you are at). We do this for a couple of reasons. When we listen with the headphones on, and the volume turned up, we can pick out background noises easier. A background noise can destroy your package. By listening first, we can spot potential noises. We can also use this “wildtrack” in the edit later. Sometimes location atmosphere can save you if you’ve messed up a recording. Example You’re doing a link live at an event, and when you get back to base, you discover “handling noise” from the microphone on the recording. Rather than going back to the event you can record the link at base. Next, you can mix your link with the “wildtrack” that you've recorded. It is cheating, and it won’t sound the same, but it will save the day. However, to avoid this hassle, just record your link properly at the event. Avoid Continuous Noises Apart from making it hard to hear the interviewee, rhythmical background noises (such as music playing in the background, etc.) can make editing audio very tricky. The listener will be able to hear when you've made an edit. This is because there'll be a change in the music/background noise when you cut the interview. Audio Recording Tip Always get people to switch off background music/equipment before you interview. Close Miking One workaround to loud background noises is to “close mike” the subject. In other words, get the microphone as close to the subject's mouth as possible. Tip Make sure you turn down the recording level on your device. Your microphone is now closer to the subject, so the potential for distortion is higher. Close miking also raises the risk of audio “popping”, i.e. loud breath sounds into the microphone, so do be careful. Another problem of close miking is that you’re invading the subject’s personal space. When you put the microphone closer to them, they’ll simply pull away from you. Quite often you’ll end up chasing them around! SO….. Always tell the subject what you’re going to do: “Listen it’s really noisy here, so I’m going to get the microphone a lot closer to you. Please don’t pull away from it.” When using this method, you MUST turn down the microphone volume otherwise your levels will distort. However, this is the last resort method, the simple thing to do is: Go and find a quieter place. 11. Bad Places to Record Audio Anywhere near a busy road. Across a table in a noisy office. It’s awkward, it psychologically puts a barrier between you and the interviewee, and the sounds will reflect back off the table surface into the microphone. Underneath large lampshades/lights/strangely shaped ceilings. You will get reflections back into the microphone, or the microphone will pick up the “hum” from the lights. In a bathroom or a “lively/hard” room. In other words, rooms with hard surfaces such as wooden floors, bathroom tiles, etc. The microphone will pick up strong reflections and “echoes” from the hard surfaces. In small spaces like an alcove etc. Odd reflections will “colour” the sound. Solutions to Background Noise Get close to the sound source (the further away you are, the more background noise you will record). Being aware of the acoustics you are in and controlling those same acoustics. Recording “wildtrack” to help mask difficult edits. Listening to the output as you record. 12. Good Places to Record Audio Near a thick curtain or a soft surface. A comfortable sofa in a quiet room. Your interviewee will feel more relaxed, and the sofa will give acoustic absorption. In a garden or other quiet outside location. There will be few acoustic reflections. However, listen out for birds, insects and the wind blowing on the microphone. Pedestrian area/quiet back street. The absence of traffic will make recording easier. Remember CRAP IN = CRAP OUT 13. Safety Tips Keep an eye out for muggers. Always have a thought for your personal safety. Always let someone know where you're going. Get the contact details of your interviewee subject before you go and meet them. Have a charged and working phone. Don't go off to an isolated spot with expensive recording equipment. Try and record public interviews in spaces where other people are. Brief Location Audio Recap Always LISTEN at your location. Eliminate or reduce the acoustic problems. If there are too many background sounds, MOVE the interviewee to a quieter location. Close mike them but turn the microphone recording level down. Watch out for “popping.” Always record about 2-3 minutes (even more) of “wildtrack” before you start. When Interviewing Your Subject Set your audio levels on a practice question. Get your interviewee to tell you about their day etc. Record them as they speak and adjust the levels accordingly. Inform them you’re only setting your recording levels. Before the interview, tell your interviewee that you may look down at your equipment while you’re recording. Inform them that this is for monitoring purposes only. You're just checking to see if the recording levels are correct. If they see you looking at your equipment during the interview, they should ignore you and carry on answering the question. Reassure them that you're listening to their answers; however, you’re just checking that everything is recording correctly. Make sure the “pause button” is OFF. (LOL, done that twice!) Make sure you’re RECORDING FIRST before you ask your first question. Make sure you’re NOT JUST PLAYING BACK! (I’ve done that a few times!) If you hear a “pop,” be confident, and STOP the interview. Tell your subject why you’ve stopped the interview. “Sorry you just popped there, I’m going to ask you that question again.” Then re-ask the question. WATCH OUT for handling noise on the microphone or “cable noise/rattle.” If you hear these noises (or any other unwanted noises) when asking a question/receiving an answer, STOP and ask the question again. Be polite, be courteous and be confident. Don’t think “that’ll be all right I’ll just carry on” because it won’t be. As soon as you get back to base, you’ll realise that you won’t be able to use that answer. This will weaken your interview. Always look at your equipment levels when doing an interview. Don’t just go on blind faith. If your levels go into the distortion zone, stop the interview, re-level the volume and ask the same question again. Make sure your headphone volume is loud enough for you to analyse the audio you’re recording. Make sure you’re not just turning up the headphone volume when you’re re-levelling your device. Always listen to the audio quality when you’re asking questions and receiving answers. Ask yourself: Does the audio distort? Is the audio level too low? Is the background noise too high: if so what will you do about it? Watch out for breath “pops”, noticeably the letters “p” and “b.” Before you go out, be aware of how windy it is. Strong winds blowing onto the microphone will destroy your interview. Did you bring a wind/pop shield for the microphone? (An often ad hoc method is to wrap some cloth around the diaphragm end of the mic if you didn’t). Wind Effects on the Microphone Wind blowing onto the microphone can be a big issue. If you're recording outside in the wind, then standing by the side of a building with your back to the wind can reduce the problem of wind noises. Too Much Reverberation The microphone is too far away from your sound source. Too much “indirect” sound, (that is, sound which has bounced off walls, floor, ceilings and other hard surfaces, etc.) will give your speech an excessively “distant” sound. The aim with recorded speech is to give the impression that the speaker is in the same place as the listener. Head Movements If at first you’re recording too far away and you suddenly bring the microphone closer, you can get “movement” issues. Example You’re standing at a normal distance from your speaker, and they’re moving their head left and right when they answer you. At this distance, there won’t be much difference to your recording. However, if you’re close-miking, then those same small head movements will be magnified. This can cause undesirable sound fluctuations on the recording. If this happens, you need to tell your subject to stop moving their head. Always LISTEN AND ANALYSE. IF IN DOUBT, JUST DO IT AGAIN! 14. Making A Radio Package What's the purpose of your interview? Who will you interview and why? What location sounds do you need to help push the story forward? What narration will you need to write? The Pro Positive Cat Charity Radio Package You're going to do a positive piece on your local cat charity. It will be a short package on what they do and why they do it. You’ll need to research this information before you interview the charity. 1) Look at their website and read up about them. 2) Go away and read up about other cat charities. Look at what they’re doing. Look at what issues they’re facing. 3) Try to talk to people who work in cat charities. What issues do they believe are important? Depending on the angle, you can bring these issues into your interview later on. 4) Now you can start thinking about your interview. 5) You interview the boss about the pros and cons and the history of the organisation. Some of her answers can be used for creating your written links. You also interview an employee who works with the cats. You get cat sound actuality on location. Sounds of people petting and talking to cats, owners whose cats have benefited from the charity. The Paper Edit This is controversial, and there's no right or wrong way to this. I was taught this method in 1997. I like it. 1. You type out word for word everything that was said in your interviews. 2. You take a marker pen and you highlight the strong quotes from the interviews. 3. You note down all the sounds you recorded. If you're going to use the paper edit method, you need to keep a focus on your interviews. In other words, don't let the person ramble off topic. Typing out every word is slow. However, the paper edit makes it easier to highlight the strong quotes. Seeing your interviews on paper makes it easier for you to craft your story. You don't have to do this. I tell students to try and make a package both ways. Make a package using the paper edit method. Make a package where you skim the audio and pull out the quotes. See which method makes the best package for you. Next, you write your links around your quotes and audio. Intro voiceover: "Jackie Catman runs the Croydon Cat Sanctuary. They've been helping cats since 2001. I decided to pop down there to see what it was all about." Location Audio Location audio of worker talking to cats. Brief soundbite of why the worker is there or what their job role is. Main interview Taking the best bits from Jackie's interview. Location Audio More location audio to bridge into next interview of cat owner. Sum up charity and day. Think of how you want to start your package. Think of how you want to end your package. A strong ending is important. Don't let your package just fade out. Different Types of Endings: End on a strong emotion/feeling. End on a great sound bite. End on some interesting actuality (location audio). End on music. Now it's homework time for you! Homework Pick a documentary from The BBC World Service site. Make sure the documentary subject is interesting to you. Write down everything the reporter does. Example Intro audio Voice over Location audio. Listen to the professionals. See how they've done it. Also, feel free to drop me an email as well. [email protected] Keep Your Packages to Three to Five Minutes Only This is very hard to do, but it's important. You'll always have too much audio. You'll also hate cutting great sound bites and great location noise. However, it has to be done. Most people won't listen past five minutes unless it's a documentary. Keep your radio package short. Think About What You Want from the Interview First If your interviewee subject starts waffling on about something that's not connected to your story, stop them. That's wasted editing time. 15. File formats This is a blog in itself, and it can also get quite anal and techy. Depending on your equipment/storage, or the amount of recording you'll be doing, it's always best to record at high quality first. Once you've done your editing, then you have the option to compress down later. It's best to record in WAV format and then compress down on export. Remember, the higher the quality you record at, the larger the file size will be. It will also use more storage. Tip If you record in a compressed format (i.e. mp3) then when you export your file, you will probably compress down again. This is where you can lose audio quality. Record in WAV and then compress down if you have to. For years, most people recorded in WAV format at 16 bits / 44.1KHz. This is known as CD quality. To be honest, I still use this. It sounds fine. At the end of the day if you record in WAV format, 16 bits / 44.1KHz it will sound perfectly fine. You can go up to 24 bits / 48KHz if you want, but I'm not that bothered. Ok, sometimes I'll go all wild and crazy and record at 24 bits / 48KHz but hey I like a beer! It doesn't sound much different, to be honest. Look, I'm not recording the soundtrack to a Hollywood movie here. I'm making a radio package for a local radio station. Let's keep it all in perspective! You don't always have to compress down by the way. If you're uploading a five-minute package to the web and you have time, upload the WAV version. It's about 10MB per minute. A 5-minute package is about 50MBs. If Firefox let's you O_o, you can go to http://www.colincrawley.com/audio-file-size-calculator and use this cool audio file size calculator. My Recording Settings I record at 16 bits / 44.1KHz mono. Crazy off My Head Settings 24 bits / 48KHz mono 16. Recording in Mono Mono = one audio source. i.e. a voice. (Or a "gob" as we like to say in south London). Stereo = two audio sources. If you're using a reporter mic, you'll be recording in mono. If you have a Zoom H2/handheld device etc., then they will have a stereo option. When recording the spoken voice, it's good to work in mono. Recording the spoken voice in stereo can be tricky. If you have one microphone or one cable, use mono. Stereo HAS to have two inputs…that’s what makes it stereo. You can easily convert the file to stereo before export. Click Here for a Quick Stereo Mono Explanation 17. Learn the Mechanics First Then Transfer Up Once you learn the mechanics of making radio packages, you can then use them as your audio CV. The more radio packages you make at a local level, the more you can use them to get a job. Put the packages you make on your website and showcase them to a future employer. Once you're at a professional station, you can use their expensive equipment. Good luck! If you make a package, then send me a link. I'd love to listen to it! Learn where to find show ideas. Discover how to show prep like a pro. Master the mixing desk. What it is, how it works and how to use it. Discover what you shouldn't do as a presenter. How to Be a Radio Presenter Me being a part time twanger Ashley Cowan runs the Online Radio School where he tutors in radio presenting and media interviewing techniques. He was a BBC World Service, Radio studio manager for nine years. He was also the station manager for Radio Kings, the hospital radio station for Kings College Hospital. Other crimes include being the training manager for K2K Radio & Whitechapel AM. As a radio presenter, he's hosted radio shows on three FM stations. That was back in the day when FM radio was a big deal. The poor radio stations that had to put up with his brand of terrible comedy were: Radio DÅB, FLR 107.3 FM, and City FM. Radio DÅB had 100,000 listeners! Woo! When he's not writing about himself in the third person, then he was also a community radio DJ at Radio Kings, TGR Sound, Sydenham Radio, and Croydon Radio. He once did production work for Total Rock.com. That was a fun station with a cool owner and a great broadcast team! Brown fizzy water often accompanied the broadcasts! In his spare time, he's London Irish (so he likes a beer). He's recently created an online "Fingerpicking for Guitar" course. There he teaches the art of fingerpicking for... erm...guitar. Students can learn twenty different fingerpicking styles for their chords. 0 Comments Comments are closed.
|
Ashley..
is an ex BBC, radio studio manager, and the ex manager of Radio Kings, the hospital radio station for King's College Hospital. He's presented on three FM stations and waaay too many community stations. Archives
May 2020
Categories
All
|

 RSS Feed
